Our family of six just returned from a short camping trip. We stayed part of a day, two nights, and part
of another day in the great outdoors.
Why
bother with camping? Our family has
found that no matter how we try to simplify, downsize, and limit distractions,
unfortunately, we are still very distracted.
We have WIFI at home, cell phones, house projects in an ever-multiplying
abundance, and mail to read and bills to pay.
We have good distractions too, like work, homeschool, and my husband
pastors a church in addition to working at his secular job. It is really difficult for us in some seasons
to feel like we are “present and accounted for” for the better part of a day,
much less a week or months. Most things
that clamor for our attention are very important things.
Several
areas of our life pay the cost for this; our children are one of those things. This
is especially true concerning quality time with Daddy, as I am with them the
vast majority of the time. But freeing
Daddy or me up to play and engage is sometimes difficult. We are worker-bees, my husband and I, and we
are trying to raise worker-bees. But
play is needful to express our love and appreciation for one another.
Camping
is a great time-out from regular life. However.
. . . .
When I
first started camping, I was very excited about campfires, starry skies, s’mores,
and hikes. But after my first time
camping with kids, I was beyond exhausted.
This didn’t seem fun AT ALL. This mama cooked, cleaned, and ate, and
then it was time to cook, clean and eat again.
Repeat. I decided that camping
was, to quote myself, “like taking the comforts of home, paring them down to
bare bones, and moving it all outside”.
I didn’t see the point. All I
wanted was Marriott.
I made a
lot of camping mistakes early in the game, and I have learned some things:
- Keep it short and sweet: On your first outing, just go overnight, or two. If possible go on Monday-Thursday, as you will have a lot of the campground to yourself.
- Keep it close: Don’t travel to Timbuktu to camp. Stay somewhere close enough to travel to in about an hour and a half, and try to go somewhere you haven’t done much exploring already. We have found that we prefer to camp in places that aren’t too far from the nearest town. That way, should rain or boredom strike, we are in a great position to explore and just get out and about with no agenda.
- Keep it “crunchy”: You know how all those books are coming out now about de-cluttering being the key to a happy life? Well, de-cluttering is THE KEY to a “happy camper mom”. Leave your hair dryer, straightener, curling iron, and most of your makeup at home. This is a time to be outdoors, and to be with your kids. No one cares as much as you do. If you can let down your “care”, you will have a much more enjoyable time. You don’t need more than 2 pairs of shoes, some clean underwear and socks, and a few shirts/pants per person. Towels, check. In fact, if you keep your trip very short and bathe everyone before you go and as soon as you get home (we may or may not have done this), you may be able to avoid all things shower-related at the campground. This is very, very awesome when you have four kids to shower. You can’t imagine how much time you waste in there.
- Keep it in a state park: If you are concerned with economics, state and county parks are the best. Research the campgrounds on your state parks’ website. It usually lists the amenities available. You may find one with a pool, and usually there are trails and playgrounds, etc. Private campgrounds can be extremely nice. But private campgrounds will usually charge you a base fee, plus a fee if you go over a certain “people limit”. We almost always exceed the base “people limit”, and then the camping fee is in hotel range. If we are in hotel range. . . then we hotel.
- Bring the kids’ bikes: It sometimes looks like it is a requirement to bike if you are a kid in a campground. If at all possible, bring your kids’ bikes.
- Keep it SIMPLE: All of it. When we first went, part of what exhausted me was I was attempting to “play house” like my daughter might: every time someone went into our little camper, I would resweeps/straighten up/put away, etc. I had a very rigid order and expected it to be like home. Well, it isn’t home. It is a campground! It is dirt and sand and sticky marshmallows and ash. And it is wonderful when you don’t let all of that stress you to the max.
Tent vs.
Camper:
We have
a 1992 Toyota Winnebago. This rare gem
is a dinosaur with great (comparatively speaking) gas mileage. It sleeps 5 comfortably. ;) It has a fridge, a stove, a toilet, kitchen
sink, and bathroom sink. We don’t use
any of that except the fridge.
Why? Because we don’t have time to dedicate days
upon days of camper preparation, that’s why.
The stove isn’t working, and we don’t want to pay the $300 for a new,
tiny camper stove. And we don’t need
it.
We
always pay to stay at the “full hook up” spots.
That means you will have access to an electrical outlet on a pole, and a
water spigot at your spot. Usually there
is a picnic table and a fire ring also.
In a state park you will sometimes pay a little bit more for this
feature, but it is well worth it.
We plug
the RV into the electric hook up. We use
the water from the spigot when we need it.
And we go to the bathroom/shower in the one at the campground.
If you
only had a tent, I would highly recommend the full hook-up spot.
Organization:
Here are
some simple ways to organize your trip to make it run smoothly:
1.
Well before you set out to camp, begin picking
up small things that you might need for a trip.
I have a small coffee pot from my mom, and a George Foreman grill and
toaster oven from the Goodwill for a total cost of about $10. Get a Rubbermaid tote and put all of your
camping appliances in it. Add to it some
aluminum foil, gallon size Ziploc bags, paper plates, cups, and plastic
dinnerware, some paper towels, a small jar of dish detergent, hand sanitizer, can
opener, extension cord, hand soap to set by the water spigot, salt and pepper,
a dish towel and a dish rag, two pot holders, a vinyl tablecloth, and a plastic
mixing bowl. Most of this can be
purchased at the Dollar Tree. You now
have a portable kitchen!
2.
You
might also gather a Rubbermaid tote and fill it with bedding for your
trip. If you are tent camping you will
want to sleep on an air mattress, even if you have an awesome sleeping
bag. You can find sleeping bags at the
Goodwill too, very cheap. They can be
washed and dried at home prior to your trip.
3.
Get
one more tote ready for “incidentals”:
flashlights, duct tape (trust me), small first aid kit, bug spray, sunscreen,
matches, fire starter, etc. You will
also want chairs for around the fire, but if you don’t have room you can just
use the picnic table provided.
4.
I
bring some of my own things from home, namely:
cast iron skillet/dutch oven, electric skillet, sometimes a crock pot,
spatula, 2 small kitchen knives, a slotted stirring spoon, tongs, and an old
fashioned black roaster pan for doing dishes in. I usually throw this in a laundry
basket. When I get home I return all
this to my kitchen.
5.
Put
a laminated checklist of each tote’s contents in each tote, and bring a dry
erase marker. Makes packing it back up a
breeze.
6.
You
will need a decent sized cooler, or better still, borrow one.
Food:
This was
the biggest hurdle to my early camping experiences. I had NO IDEA what to make! I knew that we
would go camping, and inevitably there would be That Guy who is over there,
roasting a leg of lamb over his fire on a solar-powered spit he whittled out of Popsicle sticks, and we were over
here with a hot dog. Or there were the Cabela camping divas, with their fancy-pants Coleman stove ($$), Coleman
lanterns (cha-ching!), and Yeti coolers (we’re talking lotto winnings here, people).
I didn’t
want the cost of camping to rival an Alaskan cruise. Nor did I want to eat Bar-S hot dogs for a
week. What was a mom to do?!?
Remember
the end goal? “Focus on my own family. And
focus on Mom being a Happy Camper.”
I
started to tap into my inner “MomGyver” (if you don’t know who MacGyver is, I
question if you are old enough to have your own kids, whipper-snapper) and
thought outside the camper. I thought
about what I would do at home if my stove and microwave went out. And I thought of my electric skillet and
crock pot.
Here is
a list of what I do for food:
- Prep, prep, prep: Chop your veggies at home. Save in ziplock bags with a paper towel thrown in to curb “wetness” (ewwwww) that ends the life of your lettuce, etc. Cook meat beforehand in the oven and bring in ziplock bags. Less fear of food poisoning that way, and less work for you on the trip. Bring lots of bagged snacks, or pick them up at a store closer to the campground.
- Breakfast: We eat big camping breakfasts. I make pop-from-the-can cinnamon rolls in the toaster oven. I make pancakes using Bisquick’s “Shake and Pour” mix, so that I can avoid using a bowl or spoon. I can fill it with a different, cheaper pancake mix to make more. I can also use it to scramble eggs. I can cook those in the cast iron pan ON TOP of my electric skillet! For bacon or sausage, I bake ALL of it at home before the trip, put it in Ziplock bags, and freeze it fully cooked. It is very easy to throw that in the oven some night before hand while I am in the kitchen anyway. Then I just re-heat it on the skillet. I use butter as my primary cooking oil because it travels solidly (nyuk nyuk nyuk!). Sometimes we pick up donuts on the way out of town for breakfast.
- Lunch: My lunches are portable, in the event that we want to venture off to swim, hike, or go into town. I usually do peanut butter and jelly, chips (I buy those bags that have lots of types of chips in them), and fruit and carrots. That way we can go if the mood strikes us.
- Supper: If you have a cast-iron skillet, you can cook on the grate provided (usually, but not always) on your fire pit should you feel adventurous. I like to use fully cooked meats. I am not trying to food poison my whole family. So we save, mainly for camping, kielbasa as a treat! We make kielbasa sandwiches, and fry potatoes in the skillet. My family loves it. We have also done:
- Tacos/burritos/rice: make meat ahead, cut up veggies ahead, cook and freeze rice
- Soup: I have used my crock pot for this when we have played all day.
- Flatbread pizzas: make pizzas, heat up in toaster oven.
- Always have s’more supplies for dessert! Or store bought cookie dough for the toaster oven.

Pancakes and the beginnings of a "pizza breakfast skillet". This is inside our little RV.

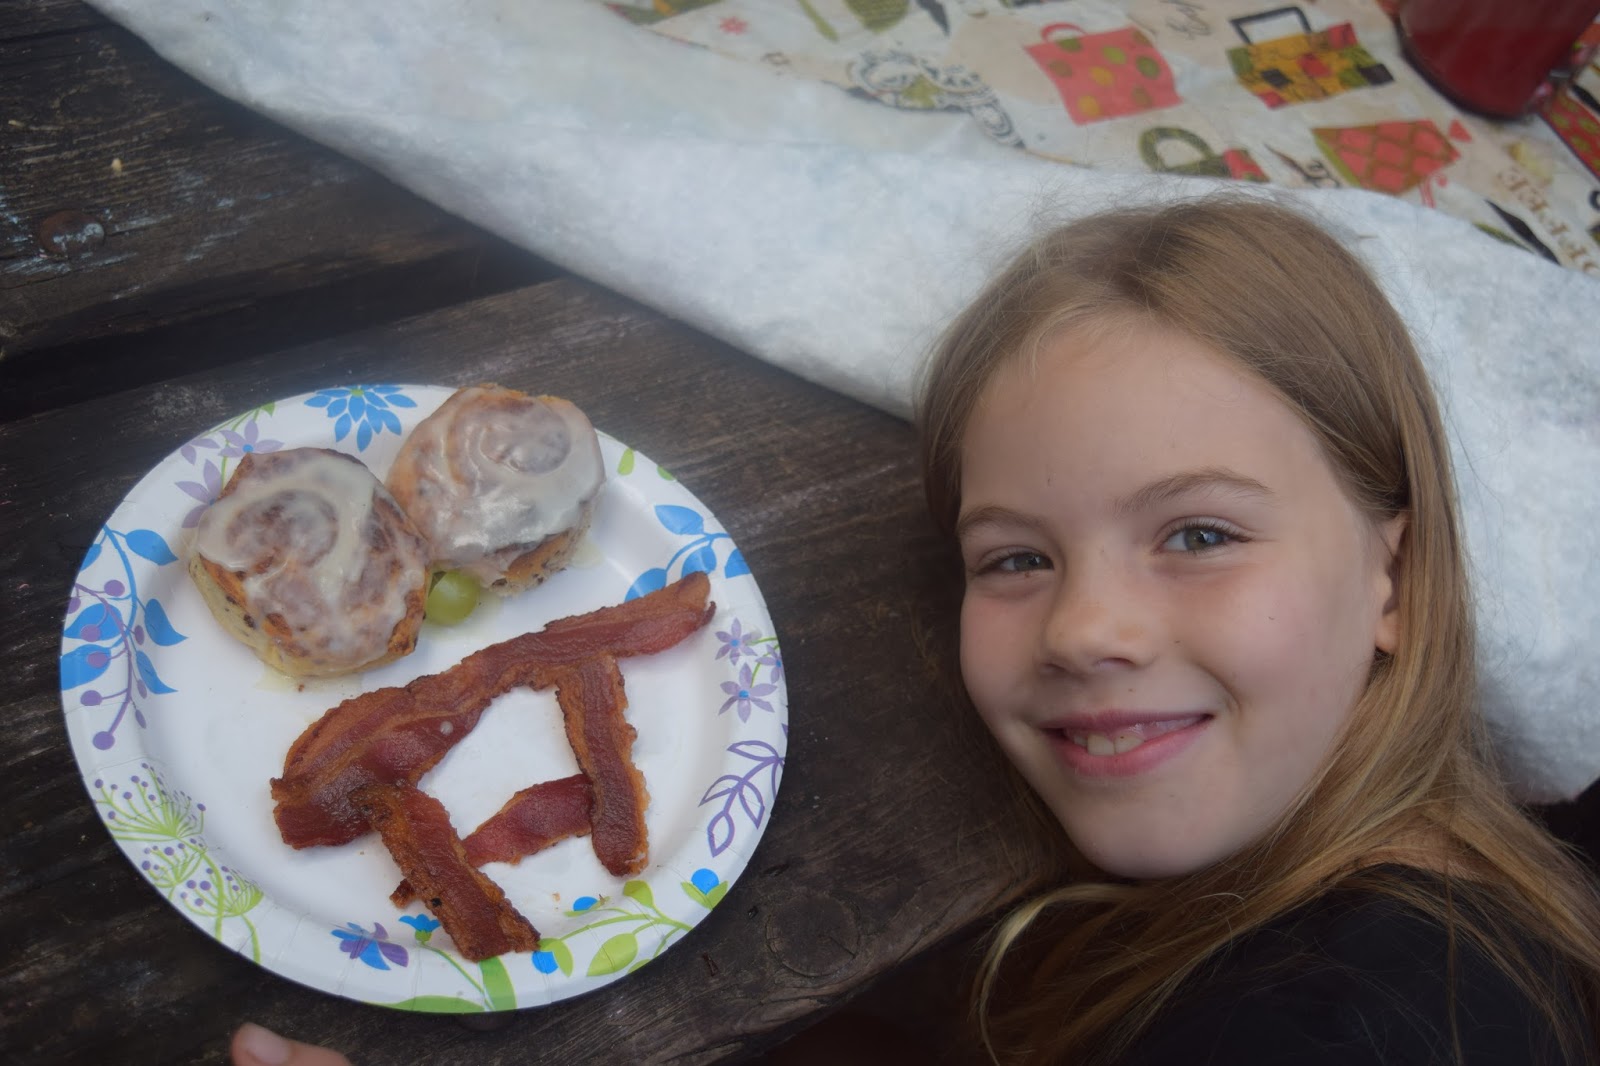
Cinnamon roll bacon face breakfast.

Above
all, don’t sweat it. Have fun with your
kids and that is what they will remember:
the time that Mom caught a “rock fish” (on my pole! I felt like Charlie Brown at Halloween!),
when Dad rode our son’s small bike, etc.
That is what this is: a time to
recharge. EVEN for Mom. She needs it too.
What
have you done to make your camping trips more enjoyable?
P.S. If you have firewood restrictions in your
area, you will probably have to buy it where you are camping.
Very good ideas!!! We enjoy camping also, and sometimes I do ask myself WHY are we doing this?? But hearing the kids laugh and tell stories around the campfire are the great memories we will have!!! Love the kids they grow up way to fast!!
ReplyDelete